To lay it out in short, this blog post is about my home sim racing (race car gaming) setup. I wanted to show and explain that it does not have to cost a lot (about $400), have to take up a ton of space, nor require the best equipment to own a fun and functional home sim racing setup. If you have no interest in car racing games, then you can just skim through the pictures and maybe watch the video at the end then move on.. cause that is all this post is about. Before we get started, not one of these mods, components, or ideas did I come up with on my own. So get that straight, I am not claiming to have come up with any of this on my own. I just copied what other, more intuitive, gamers came up with and found what works best for me. This is about my full set up as a whole.
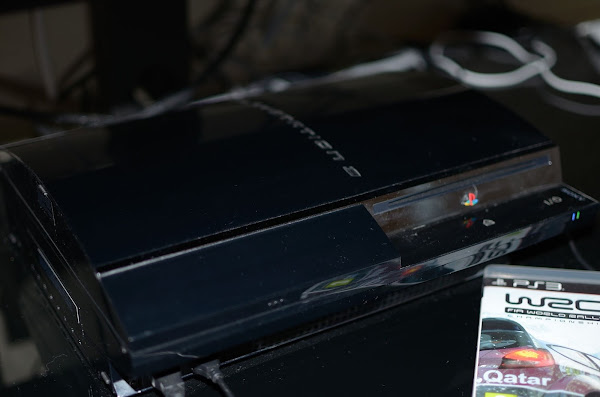
Starting with the basics.. I play on a Playstation 3. Not some expensive home built PC gaming rig or even a new PS4 (Don't get me wrong someday I will upgrade to a PS4 or build a nice PC). It is an old PS3 and you can get one of these things for very cheap now.. $200 brand new with a couple games or buy one used somewhere for less. The racing games on this system play at 720p basically (except for Gran Turismo 5 & 6 which is some scaled version of 1080 that is not exactly 1080p). Not quite full HD but trust me it is good enough. The games that I play currently are Gran Turismo 6 and WRC 4 but I also have F1 2011 and Dirt 3. Another good game series for this system is Need for Speed Shift, but I have not tried that yet. WRC 4 is my favorite.. rally is just more fun to me, but everything else is fun shit too. Now, on to the components...
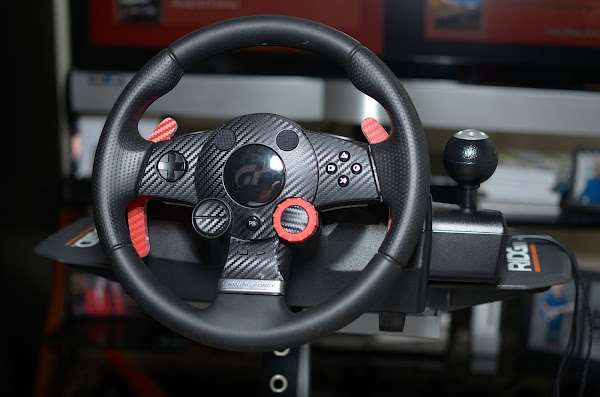
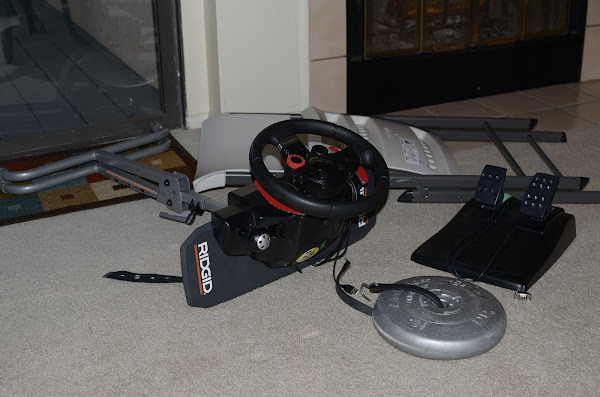
The first and most obvious, the wheel. This is a very important choice for sim racing. There are many different models and brands. What I wanted was force feed back (Wheel pushes back as you drive like a real car), it would work on PS3 & PC, and it did not break the bank. I chose the Logitech Driving Force GT wheel and pedal set (DFGT for short) seen above. They retail for about $149.99, but can be found used for as low as $50, or in my case new but dented box for $99. This wheel is great for the cost, full featured, and 900 degree steering lock (which means it turns around a full turn in each direction like a real car). Biggest weak point on this wheel is the cheap, low resistance, no feel, brake pedal that really should be improved. I will go into the simple ways I improved the brake feel on mine later. First I will start out with an improvement for the wheel that I also consider a component because well, I paid for it.

This component has to do with the second major short coming on the DFGT, which is the tiny shift buttons on the back of the wheel. They can be easily missed when making sharp or quick erratic turns like when drifting or rally racing for exmaple. I tried using the sequential stick on the right of the wheel, which works fine on its own, but then I would be missing my handbrake which is key for rally. I tried different button combos, considered different modding options, even stopped playing WRC 4 until while surfing for DIY mods and sim racing sites, I came across
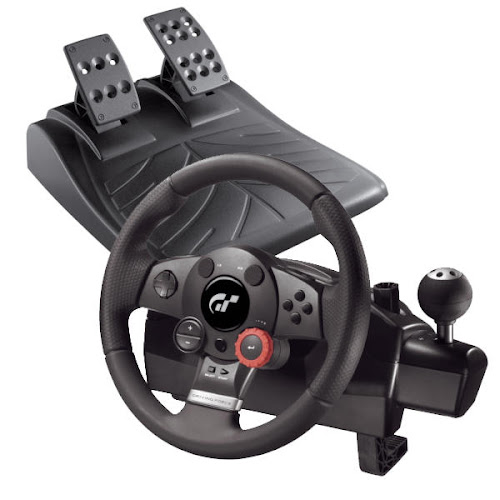
Gran TurGismo. This guy makes these sweet dynamic shifter paddles that work wonders. The sample bellow are the real carbon fiber ones, but I opted for the hard plastic ones with red carbon decals. No bother to me though, the quality and operation are the same plus they cost less.
![Image Not Found]()
The kit comes with everything you need and no tools are required. They are held on with some industrial adhesive strips, and as far as I can tell, wont come loose. They feel screwed on to me, but if they ever even slightly come loose, I will drill holes in my wheel and screw them on with the pre-drilled holes, I like them that much. The specific model I have are the latest DPS-200s which are adjustable allowing me to make more room for my fat fingers. These things have been out for years, have been through some serious testing, improved over time, and are just rad... They look sweet, and I highly recommend anyone with a DFGT to seriously consider buying yourself a pair. These shifter paddles where the last addition to my rig and made it feel complete and more enjoyable. I almost dropped the cash to upgrade to a Logitech G27 which costs $250, so he basically saved me over $200 with this product. He even makes cool carbon fiber decals for the DFGT wheels, which I have installed on mine.

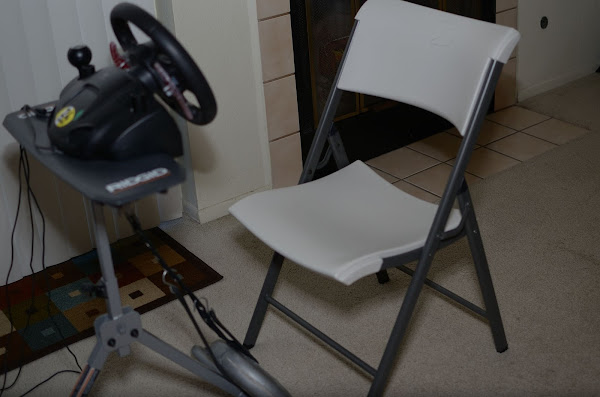
Another very important part to a sim racing set up is where and how to mount the wheel. If you have a nice solid desk and play from there, well then you're set. I used to have a wood desk that I set up on and it worked great. Then I hooked up with this great girl, one thing led to another, blah blah blah.. the desk is gone and I live with her. Now that I am not living in a bachelor pad, I had to figure out a way to set this stuff up and be able to store it away. I looked online and saw many creative ways to make a setup, and even more costly purpose built ones. It took many hours searching the net until I came across a guy who found a decent priced solution that required very little modification. A RIDGID Flip Top Portable Work Support. These things range from $20-$30 at hardware stores, are very strong and fold up nicely. There were a few quick and dirty modifications I needed to make to this stand that I will get into later.

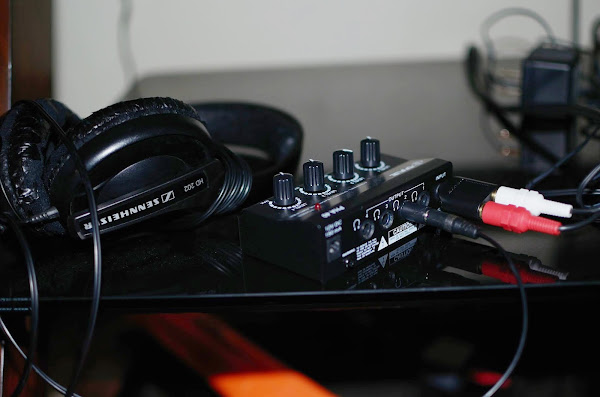
Since I often like to play late at night while others are sleeping, I needed a quick cheap way to hook headphones up to my PS3. The volume strait out of the PS3 and the audio out on our TV was just not loud enough. I also messed with a pair of wireless headphones, but they seemed to get interference from the electronics, like the wheel, the PS3's blue tooth, wifi, and who knows what else. So I found myself a headphone amp online for $13.

To get it hooked up to my console and my headphones, it required a couple adapters as the input and outputs are 1/4" stereo jacks.

The PS3 has the ability to broadcast sound out of both the HDMI and the standard audio cables it came with. So I leave the HDMI connected to my TV and connect the standard RCA audio out to an RCA to 1/4" stereo adapter allowing connection to the headphone amp. During the day I just use the TV speakers and at night, I turn the volume down on the TV and use headphones without any loss of sound quality.
Just use some good quality headphones and you're all set.. let's see.. what is left. Oh this is also kind of important. My chair.. yeah so a real laid back racing seat would be really sweet huh? Well, like I said before, I don't have the room for it. So I found myself a very comfortable and stable fold up chair at CostCo for $14..
So what am I looking at here.. $200 for the console, $100 for the wheel, $30 for the shifter paddles, $25 for the stand, and $14 for the chair... lets just call it $400. Get a couple used games and your at a total around $450 (including taxes). This is assuming you already have a TV to setup in front of. Alright, now onto a little DIY modding needed to get this all to work like I wanted..

As you can see the stand has a weight hanging from it and the height adjustment bar is no longer sticking out the bottom. I just fond that the stand needed a little extra weight to feel solid, and hanging a weight off the top bar to the front legs worked the best for me. Naturally I push forward on the wheel and don't pull back much. So hanging the weight in this manor kept it out of the way and is the easiest to remove for storage. This I find is the most ghetto part of my setup. Oh well though, it works. It is a 8lb plastic weight, a rubber bungee cord, and an old belt. Things I had laying around. As for the height adjustment bar.. I just used a saw and cut the extra length off. No need for that thing to go 6FT high and having the extra bit sticking down would get in the way. The pedals rest against the rear leg bar and the rear down bar goes in between the two pedals. Since I started out racing go-karts as a kid, braking with my left foot is natural to me, and so I use my left foot for the brakes.

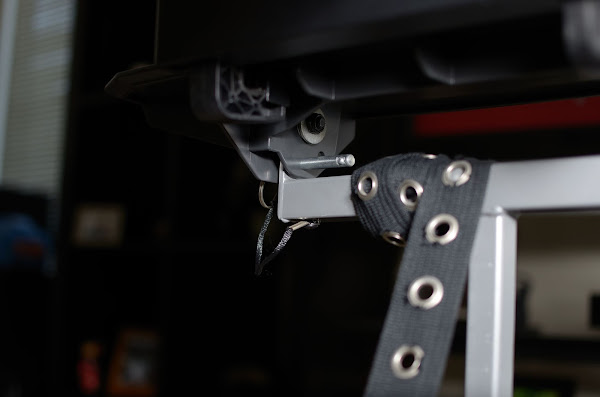
Since this stand was originally designed to have a free moving top with only a single pin to hold it flat, it was not very solid. So I took the bolts out and used rubber and metal washers to fill the open space between the stand holes, and the table top's holes on the bolt. That way when I tightened them back down it was snug. With the pin out, it takes a good amount of force to fold the top down, so with the pin in place it is very solid. So that is the stand.. not as pretty as a purpose built play seat, but does the trick. I plan to upgrade it a little more as the seating position represents more of a mini van than a sports car.. being that the pedals are not very far back from the wheel. My idea to fix this is to bolt an extension on the top to allow the wheel to be closer to the driver. Also to put something under the stand legs where the pedals are raising that end of the stand and angling the pedals more naturally. This would also add weight and pressure on the stand increasing stability. But it works so well as is, so I am not in a huge hurry to get it done. The video at the end of this blog shows how well this stand works.

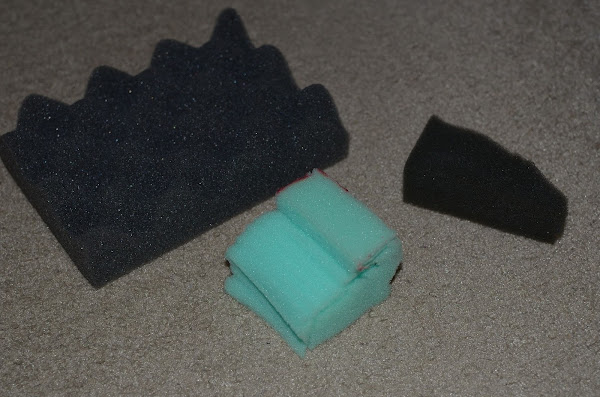
Now on to the pedals.. Out of the box these things need some work. They are almost exactly the same ones that came with the older Logitech Driving Force Pro wheel. People have been complaining to Logitech about the crummy brake pedal for years.. yet it is what it is. There is a spring on the pedals, but the resistance is basically only enough to push the pedal back to the top. Some people even report it struggles to do that. So as you can see in the picture above there is a piece of green foam behind the brake pedal, plus there is also a small piece behind the gas pedal. The foam is there to add a gushy resistance that increases the further you push the pedal down. There are other things people use, one of the more popular is a Squash Ball, but I had foam laying around. I cut foam in different shapes and found what worked best. I found that a 90° triangle wedge cut out of the wider green foam with about 2 inches of flat space on top does the trick. It does not have to be perfect. If you need to see an example this video is where I got the idea from
Video Link Foam Rubber Wedge .

Now if you want to get an even better feel.. you should add more resistance by either modifying the spring or using bungee cords. I did not like the bungee cord idea as they bound up on me, others really like it so try it yourself. I chose to open up the pedal box and modify the spring. Once I got it open, I found I did not have the right tools in my apartment to open up the spring to create more resistance. So I found the idea seen above and went that route. If you need instructions on how to unscrew and open up the pedal box you can search online. If you are the type that works on electronics, RC cars, or anything of that sort then jump right in it is pretty easy. Just take a few pictures of the inside once it is open, and carefully work the pedals to see how it operates in case it comes apart on you, that way it is easy to get back together. If you are not sure there are pages after pages of instructions online. Just google search driving force brake pedal mods or DFGT brake pedal fix or anything of that sort.

I did not have any fuel hose or rubber tubing on hand, but what I did have was a box of vacuum caps that can be purchased for a few dollars at any auto parts store. I just cut the closed end of the caps off on the smallest ones and slipped it over both ends of the brake spring. This helps the spring fit tight and make it thicker, both add more resistance. I put it back together and liked the results but wanted a bit more.. So I opened it back up and slipped the next size of vacuum caps over the ones already on the spring on each end, then added a third to the end that does not rest inside the brake pedal arm. This end is held by the bottom plate of the pedal box, so you could even just glue rubber to the location the spring rests on the bottom plate and get the same affect. This gave me a great feel combined with the foam. I did not modify the gas pedal spring, but if I open them up again, I will likely just put the smallest vacuum cap on the end of the spring that rests inside the pedal arm. This would give it a snug fit and better feeling when first pressing the pedal.

Portability.. This is one of the best features of my set up. This thing folds down in a couple mins and can be put under the bed, in a closet, or even put in a car to transport to be played elsewhere. I also own a 24" LCD monitor that has audio out so I can set it up anywhere there is power. I have used it with my xbox 360 and the crummy xbox force feedback wireless racing wheel (discontinued) to play Forza 4. Only so my LeMons racing team can practice Sonoma Raceway which has been missing from the Gran Turismo series for sometime. Forza 4 is a great game, but the wheel options for Xbox 360 are terrible except for the costly ones. This is why I only play racing games on the PS3 and my xbox is collecting dust. To connect the xbox wheel to the stand, I had to use a book as a spacer.. the clamp on it is functional at best and poorly designed.

Well that is pretty much it.. not much to it. Here is a crummy video I made to show off how well it works with the addition of the Gran TurGismo shifter paddles. Enjoy!